Using “My Local Stores” to Find Better Local Deals with BrickSeek 🛍️
If you’re not seeing the deals you expected—or you’re wondering why your feed looks different than someone else’s—it might come down to one simple feature: My Local Stores.
🔎 Think of “My Local Stores” as the local lens BrickSeek uses to help you find deals near you. Setting this up the right way can make a big difference in what you see, how fast you find deals, and how far you might need to travel to score them.
📍 What is “My Local Stores”?
My Local Stores is the feature that lets you tell BrickSeek which local stores you want to monitor for deals. Once set, BrickSeek prioritizes deals from those stores in:
• Your Local Deals feed
• Your Deal Alerts
• Your Shopping List notifications
• The Snapshot Page when comparing prices
🛠 How to Set Up or Update Your My Local Stores List
My Local Stores is the feature that lets you tell BrickSeek which local stores you want to monitor for deals. Once set, BrickSeek prioritizes deals from those stores in:
3. Select the retailers you shop at most (Lowe’s, Home Depot, Best Buy, etc.)
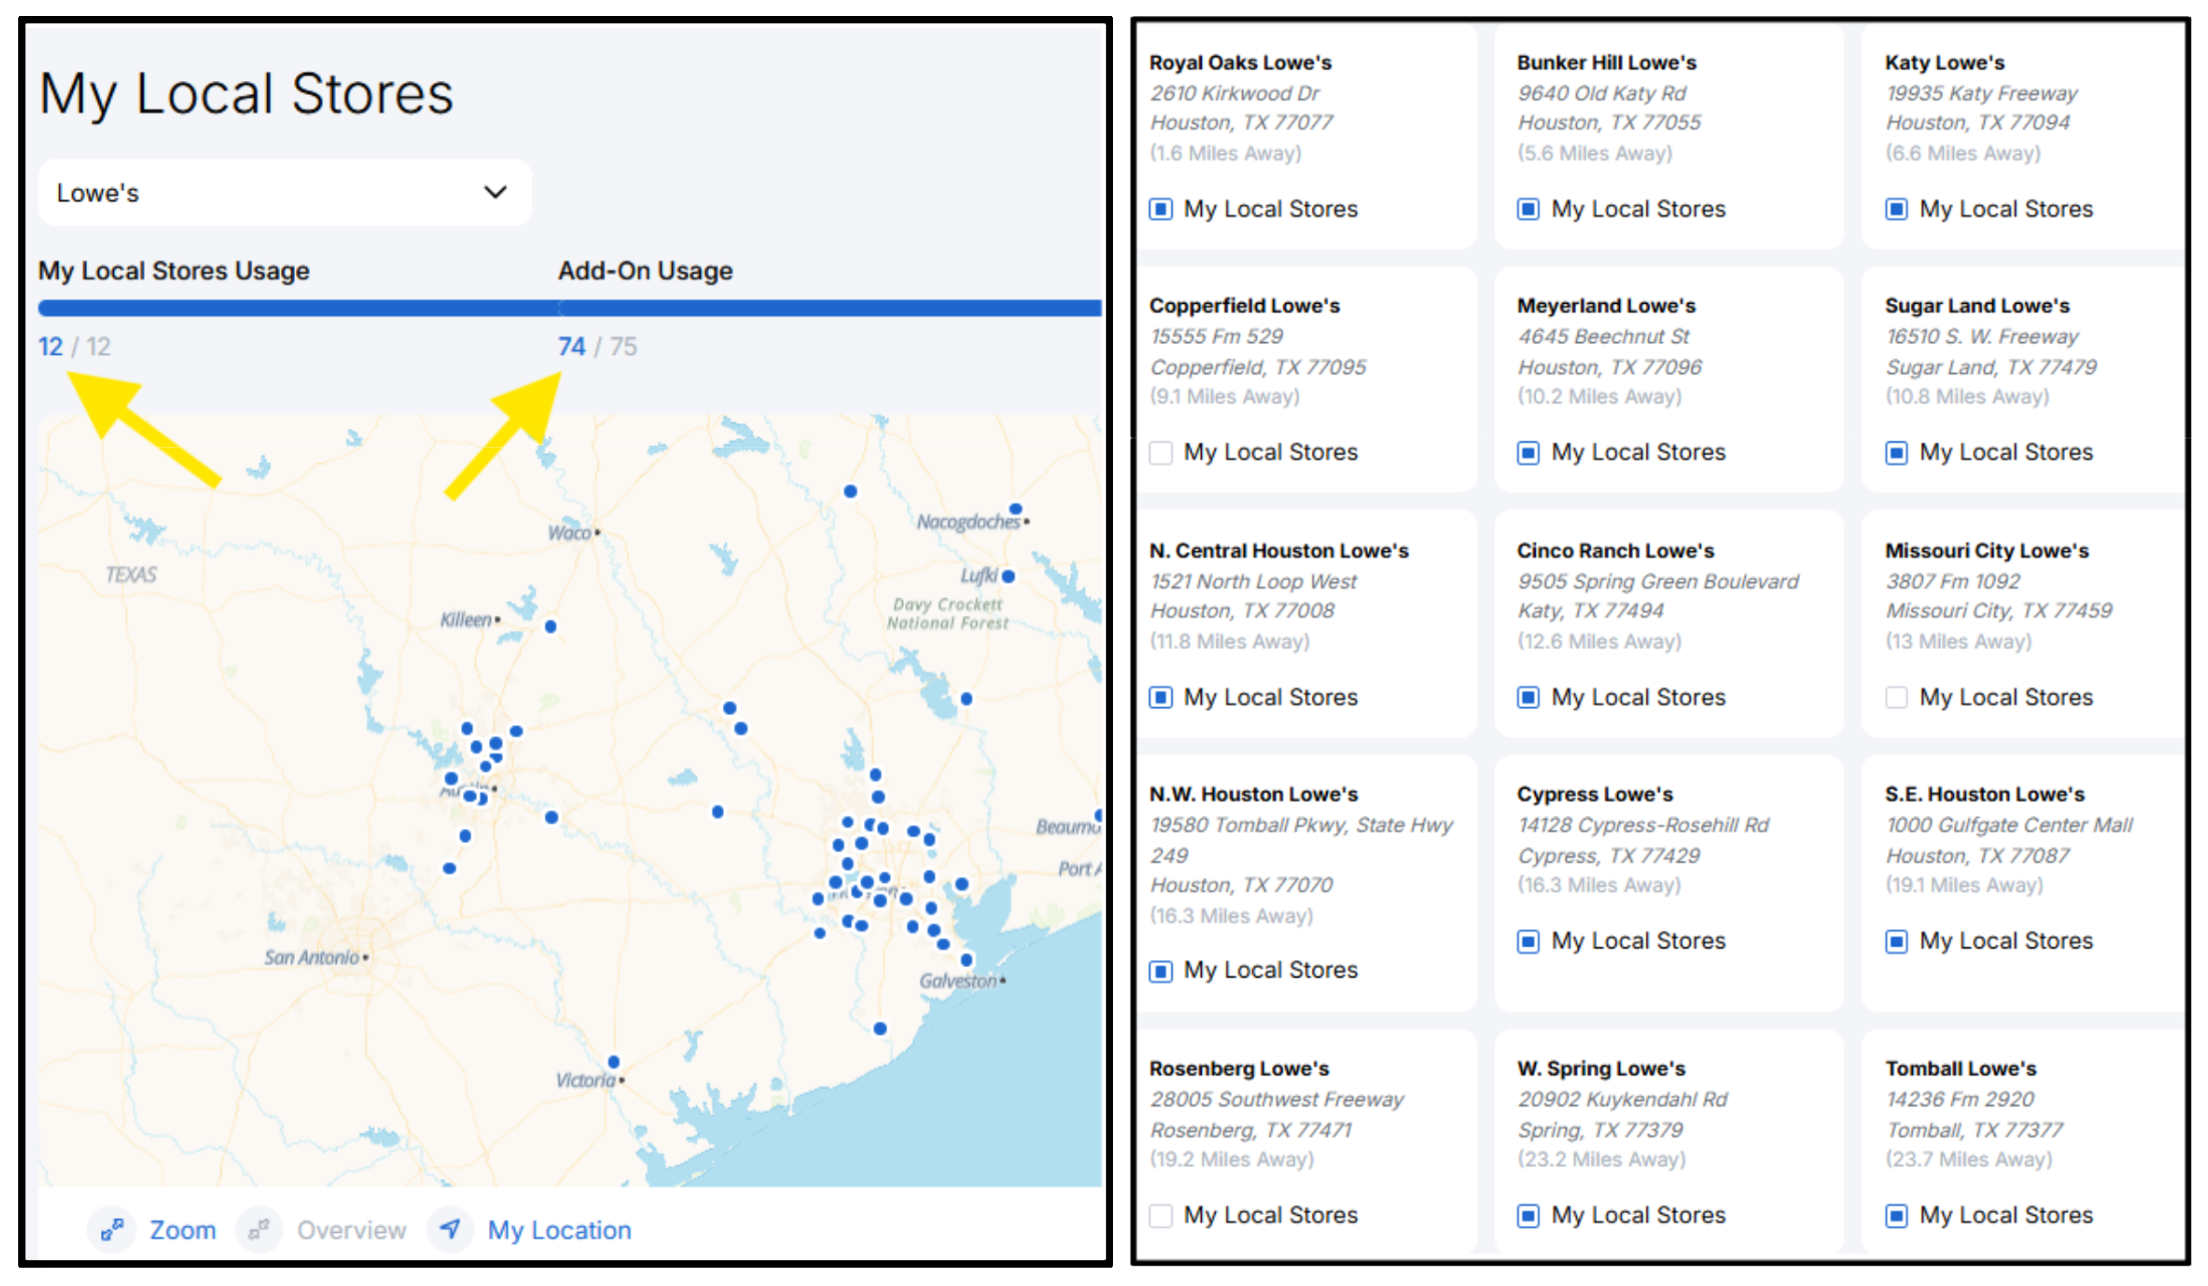
4. Add individual store locations for each retailer near you—use the map or ZIP code search to choose amongst up to 150 locations up to 150 miles away.
BrickSeek One members may select up to 12 locations per retailer. With the My Local Store add-on package, an additional 75 locations may be manually selected amongst two or more retailers. For instance, manually select an additional 35 Lowes locations, 30 Home Depot and 10 Best Buy.
5. Save your preferences.
✅ Pro Tip: Add stores you’re willing to travel to, not just the closest ones. More stores = more opportunities. 💰
🧠 Why This Matters: Deal Visibility Varies by Store
Here’s something important to understand:
BrickSeek doesn’t show every deal everywhere to every user.
That’s because:
• Markdowns are store-specific
• Clearance pricing is often controlled at the local level
• Inventory levels vary—an item may be marked down but out of stock in your area
So if your selected stores don’t have active markdowns at the moment, you won’t see them. But another user 15 miles away might.
🛒 Examples of How My Local Stores Can Help You Win
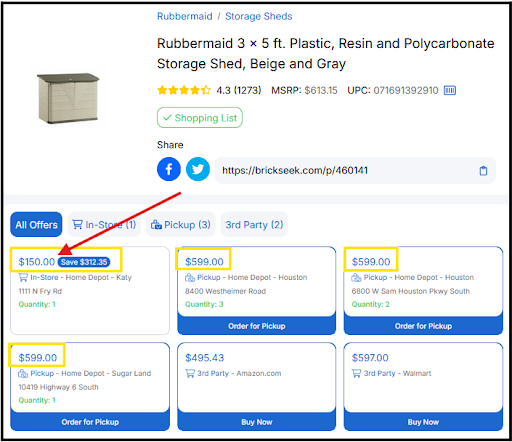
🛠️ Home Depot Example:
You’re tracking the Garden & Outdoor category Deal Alert, but only one of the four local Home Depot stores you frequent marks storage sheds down.
If you haven’t added that store to My Local Stores, you might not see this storage shed in your Local Deals or Alerts—even though it’s available!
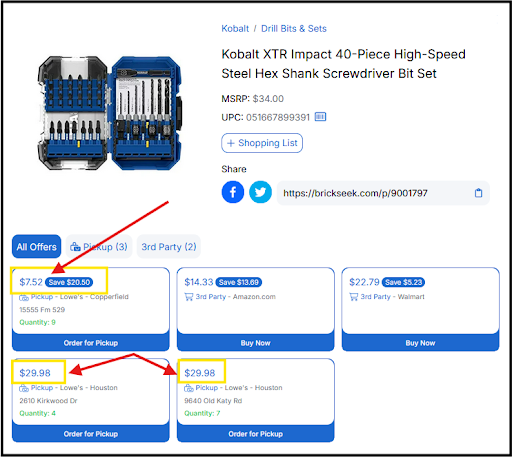
🛠️ Lowe’s Example:
One Lowe’s location might drop drill bit sets to 75% off while others are still at full price.
💡Adding more stores to My Local Stores ensures you catch the better deal when it happens.
🗺 How Many Stores Should You Add?
It depends on your shopping habits—but here’s a general guide:
User Store Table
User Type
Suggested Store Count
Light Shopper
2 – 3 stores nearby
Casual Deal Hunter
5 – 7 stores within a 15–20 mi radius
Power User / Reseller
8 – 15+ stores, willing to travel 30+ miles
🔥The more you’re willing to explore, the more BrickSeek can surface deals for you.
⚠ Common Mistake: Only Selecting One Store
We often see members only add their single closest Lowes or Home Depot store—and then wonder why deals feel limited.
💥 More stores = more inventory = more chances to win.
📌 Quick Tips to Maximize Your My Local Stores Setup
• Update seasonally. Add big-box stores near summer vacation spots, holiday shopping centers, etc.
• Remove stores with low traffic or poor markdown history if they consistently disappoint
• Sync My Local Stores with your Deal Alerts so you get the most accurate notifications
• Check Snapshot Pages often to see how pricing compares across your selected locations
🧠 Final Thought: My Local Stores = Your Deal Targeting System
If you’re serious about finding local deals, setting up My Local Stores properly is non-negotiable. It tells BrickSeek where to look—so we can help you save more, waste less time, and catch the best markdowns near you.
Don’t leave it to chance!
Update your My Local Stores list today, and start seeing the deals that matter most to you.
The rich text element allows you to create and format headings, paragraphs, blockquotes, images, and video all in one place instead of having to add and format them individually. Just double-click and easily create content.
Static and dynamic content editing
A rich text element can be used with static or dynamic content. For static content, just drop it into any page and begin editing. For dynamic content, add a rich text field to any collection and then connect a rich text element to that field in the settings panel. Voila!
How to customize formatting for each rich text
Headings, paragraphs, blockquotes, figures, images, and figure captions can all be styled after a class is added to the rich text element using the "When inside of" nested selector system.


.svg)
.svg)

